Template Type #
Choose from multiple layout templates to control the visual structure of the thank you page booster: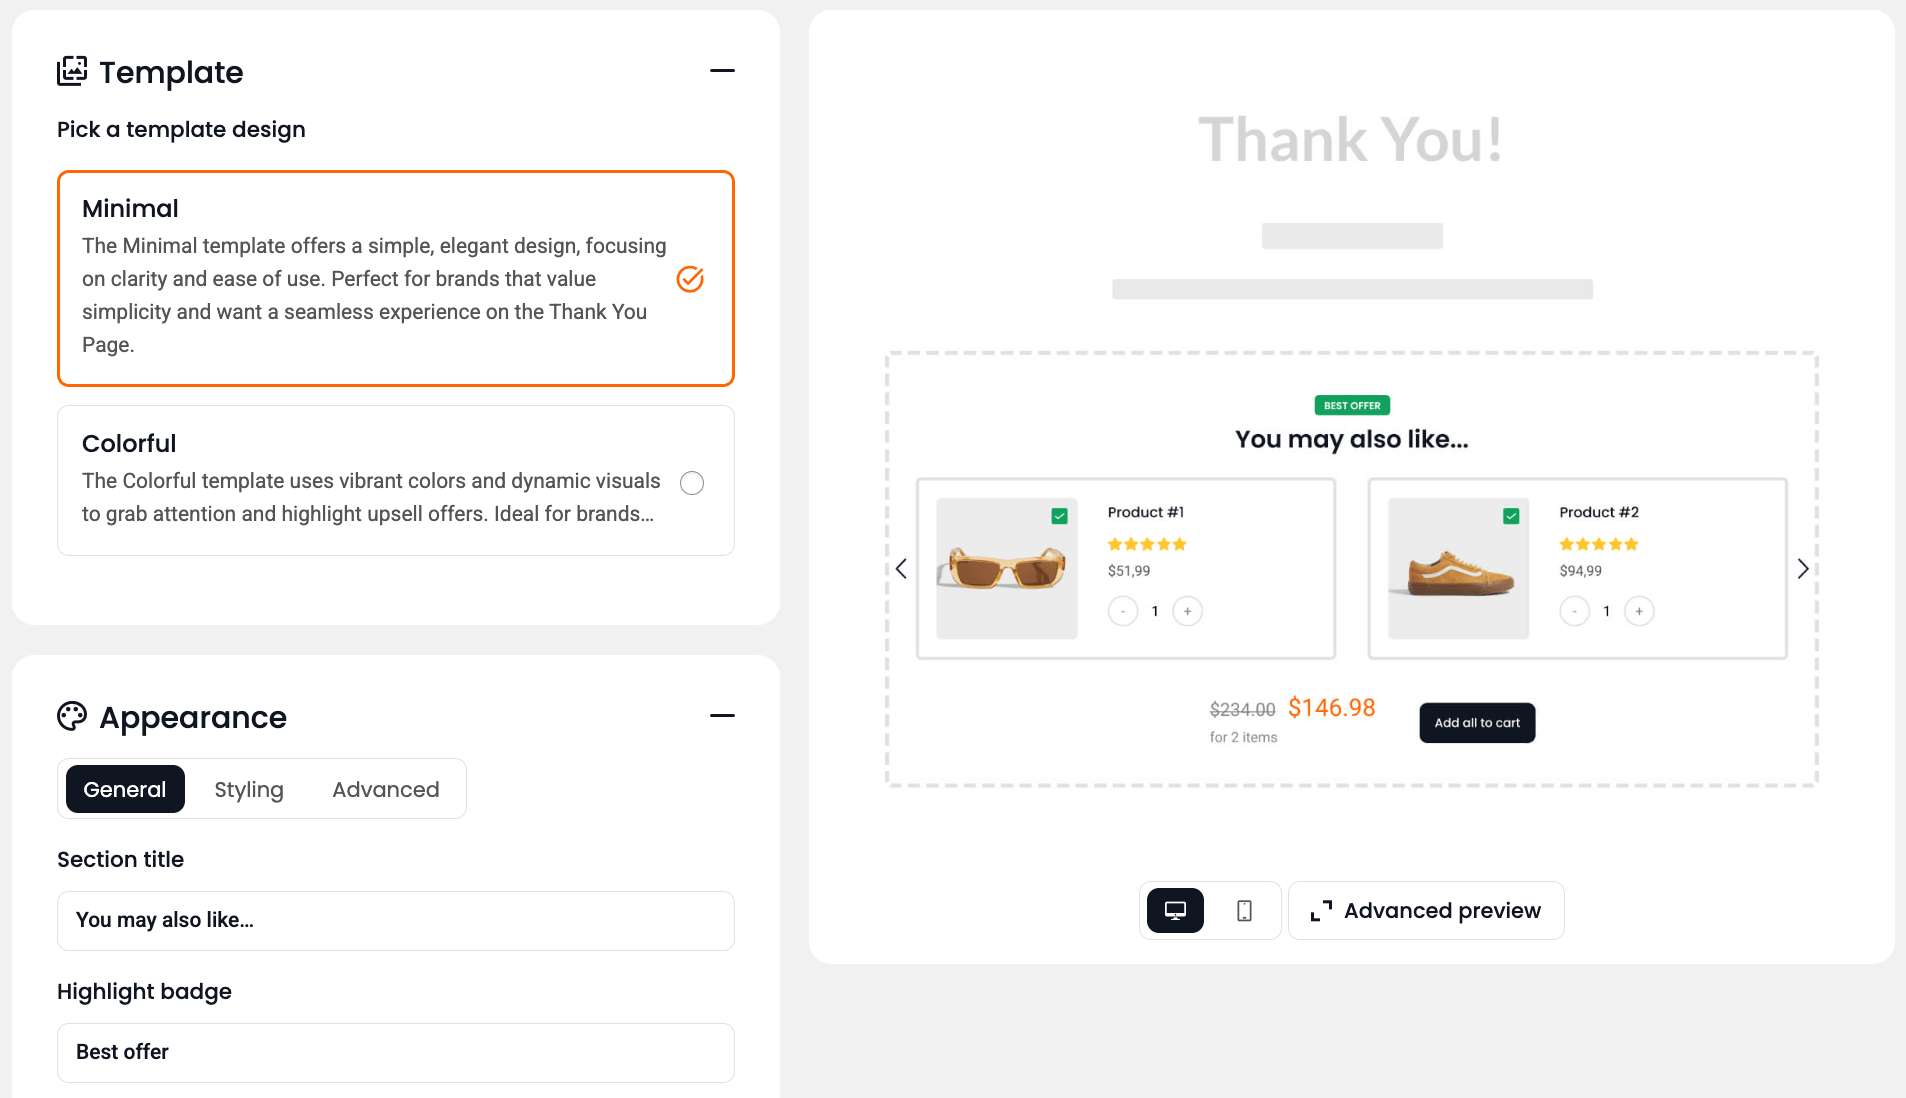
– Minimal – The Minimal template offers a simple, elegant design, focusing on clarity and ease of use. Perfect for brands that value simplicity and want a seamless experience on the Thank You Page.
– Colorful – The Colorful template uses vibrant colors and dynamic visuals to grab attention and highlight upsell offers. Ideal for brands aiming to make a lasting impression and boost engagement on the Thank You Page.
💡 The selected template may affect the availability of some display options and elements in the Appearance section.
Appearance Settings #
General
These settings let you control the actual booster display and messaging:
Section Title
Sets the main heading for the upsell block.
Use it to briefly introduce the post-purchase offer (e.g., “You Might Also Like” or “Special Offer Just for You”).
It should reassure the customer that their order is complete while introducing the next opportunity.
Section Subtitle
Optional supporting heading text.
Use this space to give extra context or a friendly upsell message (e.g., “Based on your order, we think you’ll love this” or “Add more without restarting checkout”).
Helps transition naturally from the order confirmation to the new offer.
Highlight Badge
Displays a small visual tag next to the title or product offer (e.g., “Exclusive”, “Just for You”, or “One-Time Offer”).
Use it to create urgency or personalize the upsell experience right after purchase.
CTA Button Text
Customizes the label of the call-to-action button (e.g., “Add to My Order”, “Get This Deal”, or “Claim Now”).
Since the purchase has already been made, this button serves as a post-checkout one-click upsell, so the text should be concise and enticing.
Advanced
These settings let you fine-tune how upsell products are visually presented within the booster layout.
Default Checkbox State
Controls whether each upsell product is pre-selected when the booster loads.
- Enabled
Checkboxes are selected by default, encouraging quicker add-to-cart actions. - Disabled
Customers must manually select the products they want.
💡 Tip: Use this to control customer interaction and avoid accidental add-ons.
Display Discount Badge
Shows a small badge directly on each upsell product indicating a discount.
This helps catch attention and highlight the special offer visually.
Discount Badge Text
Customize the content of the discount badge.
You can use the following placeholders to display real values:
– {price} – the discount amount in currency
– {percentage} – the discount percentage value
Example:
Save {percentage} → becomes Save 15%
Save {price} → becomes Save $10
Show Carousel Arrows
Displays navigation arrows if multiple products are shown in a horizontal carousel layout.
💡 Tip: Enabling this allows customers to scroll through more upsell items, especially useful on mobile or when space is limited.
Product Selection #
This section lets you control how products will be selected and handled inside the booster.
You can choose between few suggestion methods:
Related products
This will use WooCommerce Related Products as Upsell products. WooCommerce decides the relation based on products having the same tags or categories.
Cross-sell products
This will use the “Cross-sell products” selected under the “Linked Products” section in the product creation page.
Use Upsell products
This will use the “Upsell products” selected under the “Linked Products” section in the product creation page.
Specific products
This will use the following set of products as Upsell products.
💡 Tip: Use the product search to find and add items.
Display Location #
Choose where the upsell offer will appear on the Thank You Page after a successful order. This allows you to place the booster in a way that best fits your layout and upsell strategy.
Available positions:
Top of the Thank You Page
Displays the booster at the very beginning of the page, above all order details and confirmation messages.
Bottom of the Thank You Page
Renders the booster at the end of the page, after all order content. Ideal for a softer upsell approach.
Before the Order Items Summary
Inserts the booster right before the product list from the order. Great for drawing attention early, without interrupting the confirmation.
After the Order Items Summary
Displays the booster right after the list of purchased products. Useful for contextual upsells based on what the customer just bought.
Note: This booster does not support popup or delay timers — it’s shown as part of the WooCommerce thank you template.
Behavior on Add to Cart #
Controls what happens when the customer clicks the Add to Cart button in booster template.
The selected upsell product(s) are added to the cart immediately.
If a discount is configured, it is applied without requiring an extra confirmation popup.
You can define a custom redirect destination after the product is added to cart:
- Redirect to the Cart
- Redirect to the Checkout
- Redirect to a custom page or URL
💡 This gives you full control over the post-action flow and allows you to direct customers based on your upsell strategy — whether to continue shopping, review their cart, or proceed with payment for additional items.
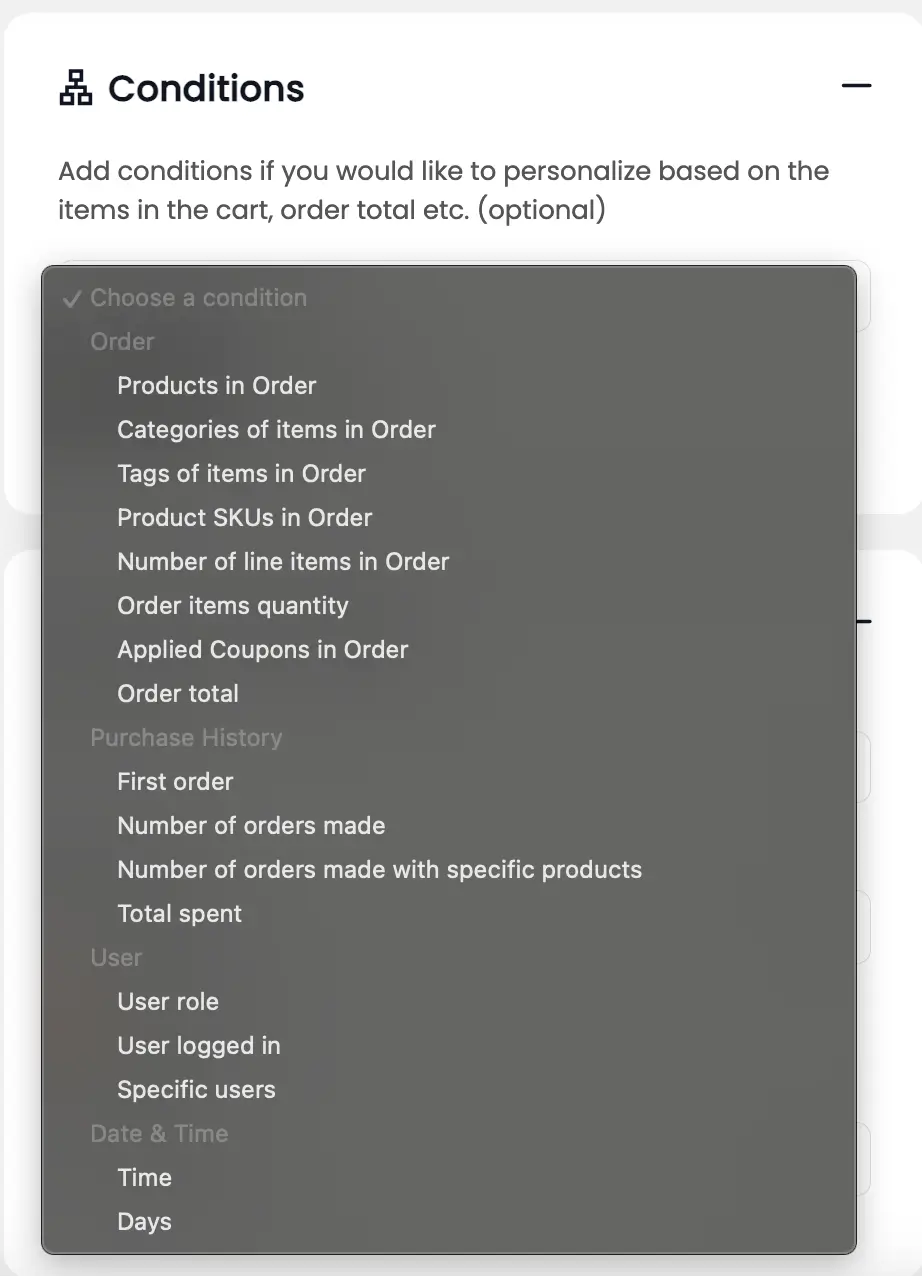
Display Conditions #
Most boosters support “conditional visibility” based on order, time, and other parameters. These rules allow you to target very specific use cases, like:
– Show only during business hours (e.g., 9:00 AM – 6:00 PM)
– Activate only when a product from category “Accessories” is purchased
– Display for users from specific roles (e.g., logged-in customers)
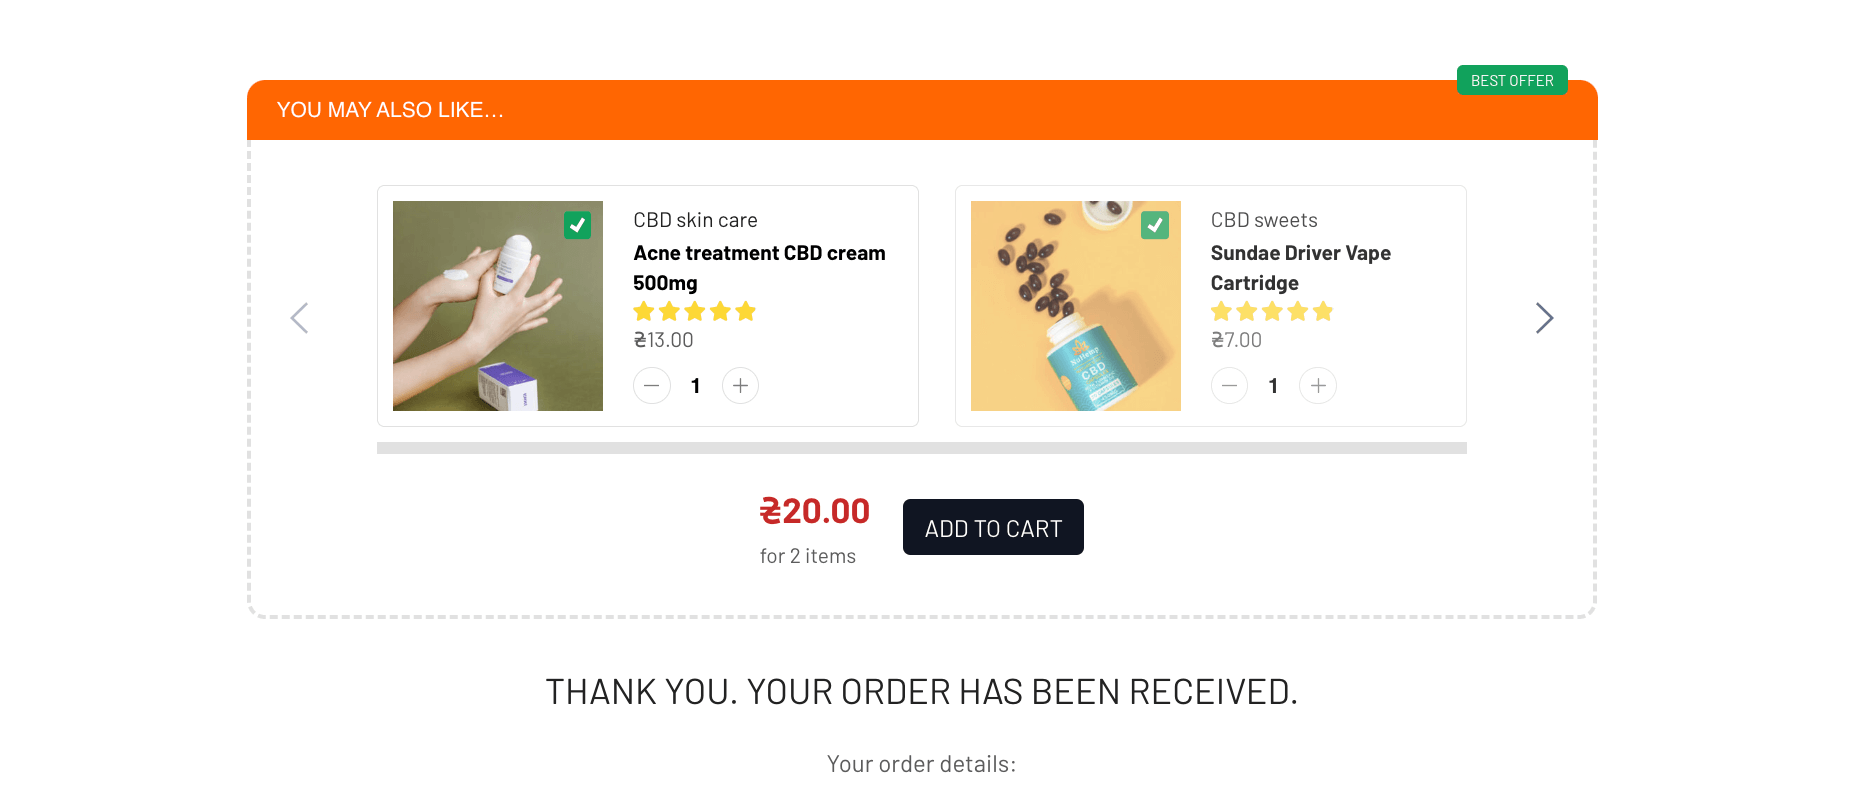
Frontend Result #
Once configured, the Thank You Upsells booster displays a post-purchase offer block directly on the Thank You page.
Troubleshooting #
If your booster isn’t displaying as expected, check the following:
- Ensure the booster is “enabled”
- Check that the product purchased matches the “filters”
- Confirm your thank you page is not overridden by a custom theme