Template Type #
Choose from multiple layout templates to control the visual structure of the offer. Templates may differ in layout, stacking, or card-based designs.
– Minimal – A clean and simple design that focuses on functionality and clarity. Ideal for presenting the “Free Gift” offer in a streamlined and professional manner. This template emphasizes the essential details, ensuring the offer is easy to understand without any unnecessary distractions.
– Colorful – A vibrant and visually engaging design featuring bold colors and highlights. Perfect for grabbing customer attention and showcasing the “Free Gift” offer with a dynamic and energetic look. This template creates excitement and a sense of exclusivity, making the offer more appealing to customers.
💡 The selected template may affect the availability of some display options and elements in the Offer section.
Offer #
General
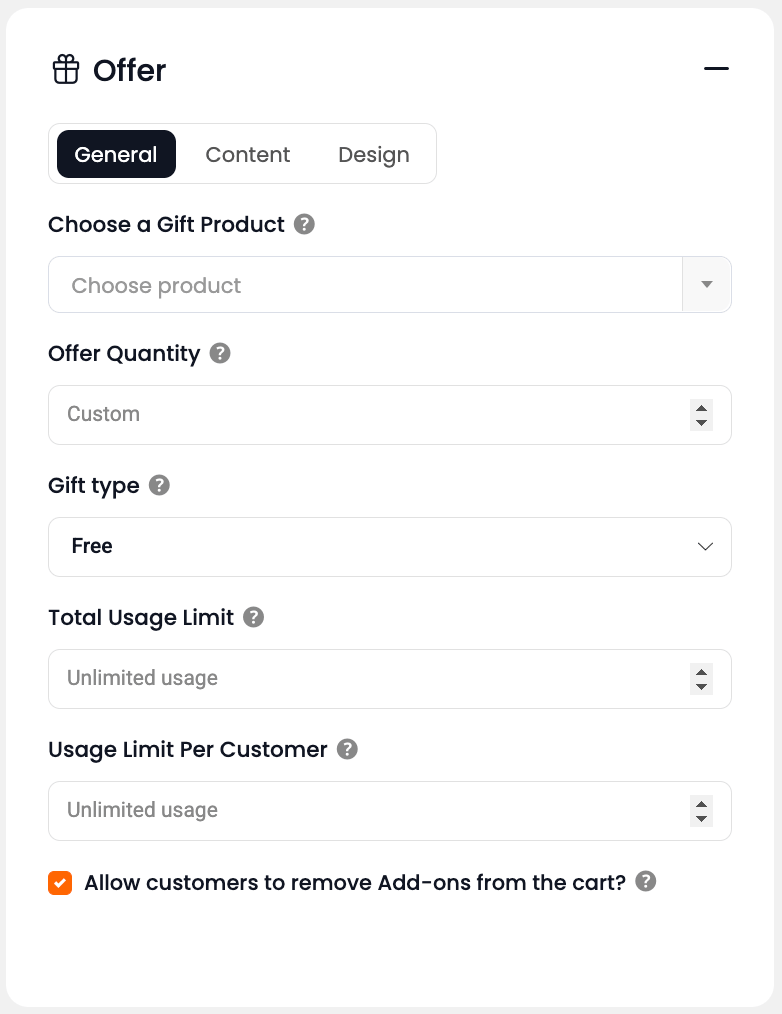
Offer Product
Choose the product that will be offered as part of the deal.
This is the product that will receive a discount or special treatment when the combo is triggered.
Offer Quantity
Set the quantity of the offer product that will be added to the cart.
Discount Type
Choose how the discount is applied to the offer product.
Available options:
Percentage – e.g., 20% off
Fixed – e.g., $5 off
Free – price is reduced to $0
No discount – no discount is applied. Offer product will be shown with their regular price.
Discount Value
Specify the discount amount based on the selected type.
For percentage: enter a number like 15 (for 15% off)
For fixed: enter a value like 10 (for $10 off)
Note: Not applicable if “Free” or “No discount” is selected.
Total Usage Limit
Set the maximum number of times this offer can be used across all customers.
💡 Useful for running limited-time campaigns or stock-controlled offers.
Usage Limit Per Customer
Define how many times an individual customer can claim the offer.
💡 Helps prevent abuse of the promotion by restricting repeated use per user.
Content
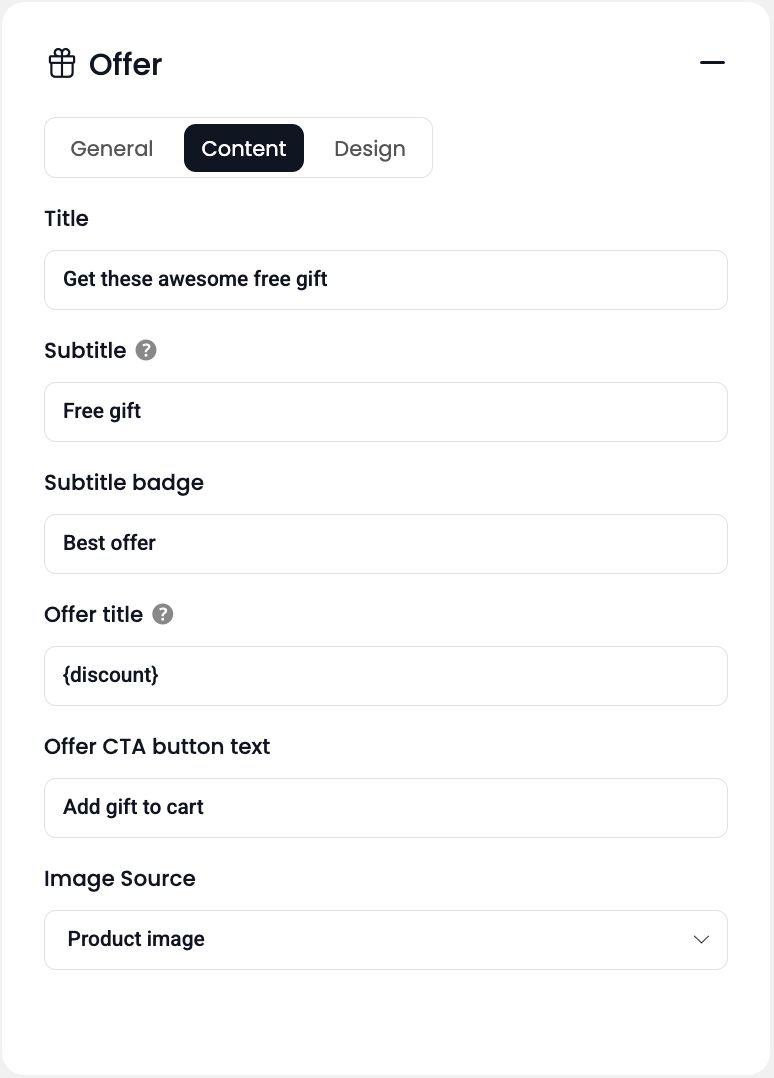
Offer Title
Sets the offer title.
Use this to briefly describe the offer or provide context (e.g., “You get this as a bonus”, “Free gift with purchase”, or “Add this to complete your combo”).
💡 Helps reinforce value and explain the offer clearly.
Offer Title Badge
Adds a visual label or tag next to the title (e.g., “Free”, “Limited”, or “Bonus”).
💡 This badge helps draw attention and highlight the uniqueness of the offer item.
Offer Subtitle
Sets the offer subtitle.
Use this to briefly describe the offer or provide context (e.g., “You get this as a bonus”, “Free gift with purchase”, or “Add this to complete your combo”).
💡 Helps reinforce value and explain the offer clearly.
Offer Subtitle Badge
Adds a visual label or tag next to the subtitle (e.g., “Free”, “Limited”, or “Bonus”).
💡 This badge helps draw attention and highlight the uniqueness of the offer item.
Offer CTA Button Text
Customize the text on the call-to-action button for the offer (e.g., “Add Gift”, “Claim Bonus”, or “Include Item”).
💡 Tip: Use clear, persuasive wording to drive clicks and conversions.
Offer Image Source
Select where the image for the offer product will come from.
Options typically include:
Product Thumbnail – default image of offer product
Custom Image – upload a unique graphic for better visual impact
💡 Allows you to tailor the design to match your brand or promotional theme.
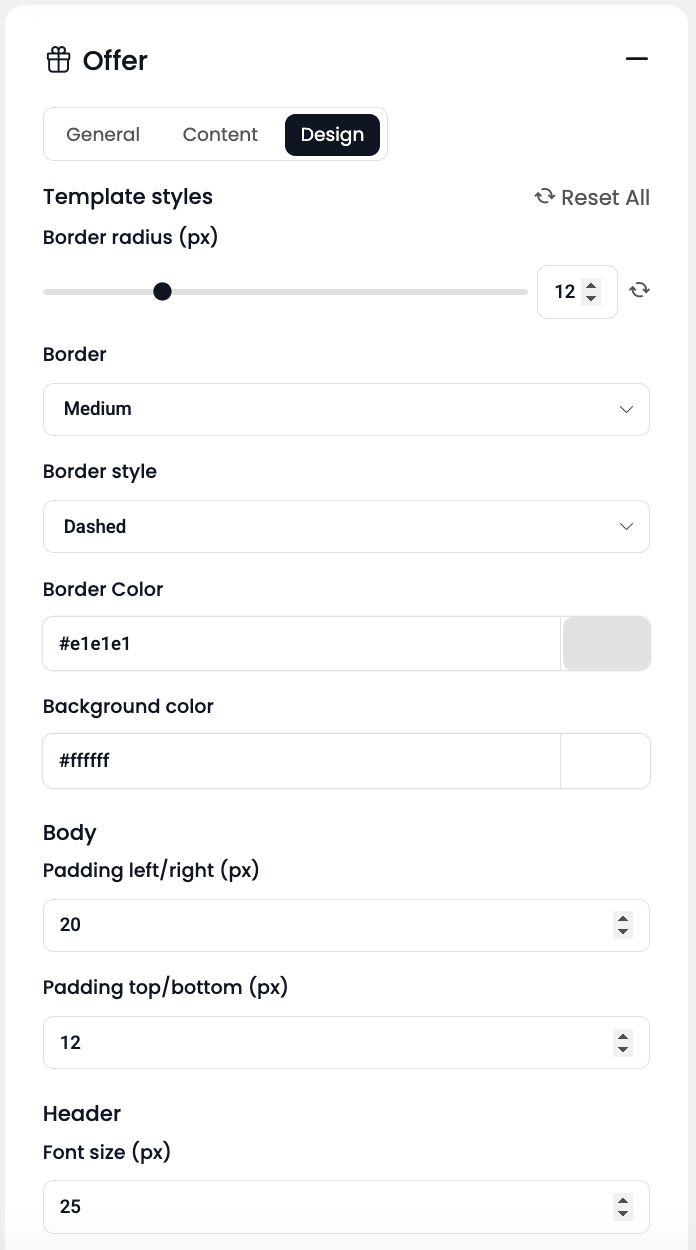
Design
This section allows you to fine-tune the visual appearance of the recommendation block and its elements — no coding required. Customize styles like spacing, colors, fonts, and layout behavior to match your store’s branding.
Here you can adjust:
Layout spacing
(padding and margins)
Container styling
(border radius, border color, background)
Typography
for titles, subtitles, and badges
CTA button colors and fonts
These options allow you to match the booster’s design with your site’s overall branding and UX preferences.
Note: Some style options may vary slightly depending on the selected template.
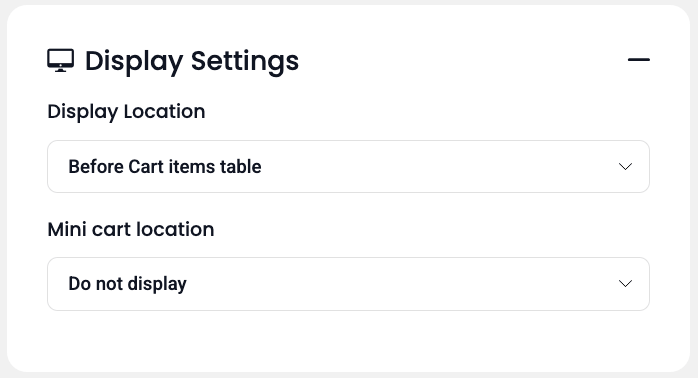
Display Settings #
Choose where the Free Gift booster will appear on your site. You can display the gift offer on the Cart page, Checkout page, Mini Cart, or insert it manually using a shortcode.
Display Location
Select a specific position on the Cart or Checkout page:
- Top of the Cart page
- Before Cart items table
- After Cart items table
- After Cart items (within the table)
- Before Payment Gateways
- Before Place Order Button
- After Place Order Button
- Bottom of the Checkout Page
- Before Billing section
- After Order notes
- Use a shortcode
💡 Tip: Placing the booster after the cart items or before the payment section can increase visibility and engagement right before conversion.
Mini Cart Location
Optionally, you can show the Free Gift offer in the Mini Cart.
Available positions:
- Do not display
- Top of the Mini Cart
- Before Cart items
- After Cart items (within the list)
- Before buttons
- After buttons
- Bottom of the Mini Cart
💡 Tip: Adding the gift offer near the mini cart buttons is effective when encouraging last-minute upsell actions without leaving the page.
Shortcode #
You can manually insert the Free Gift block anywhere on your site using the shortcode:[smax_free_gift]
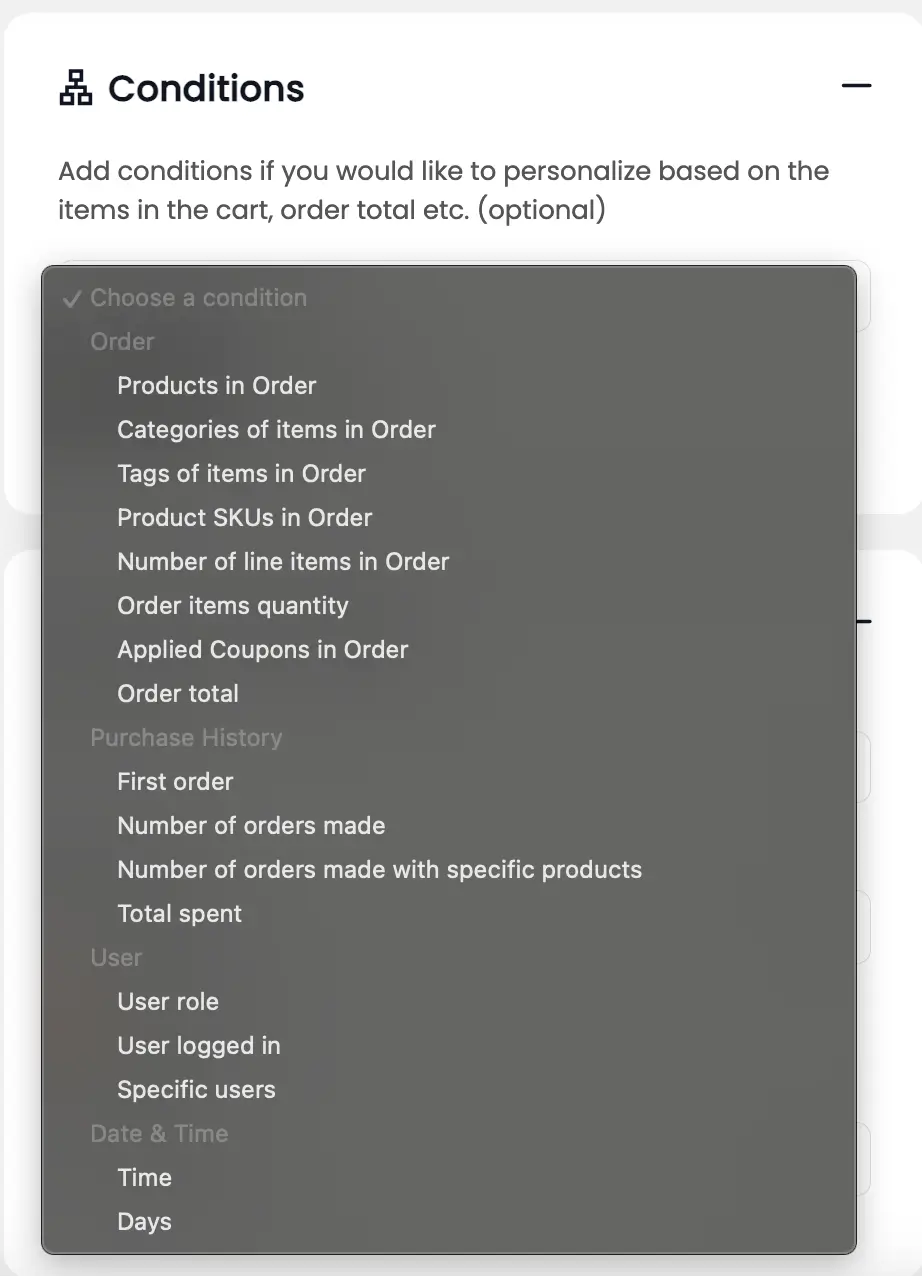
Display Conditions #
Most boosters support “conditional visibility” based on order, time, and other parameters. These rules allow you to target very specific use cases, like:
– Show only during business hours (e.g., 9:00 AM – 6:00 PM)
– Activate only when a product from category “Accessories” is purchased
– Display for users from specific roles (e.g., logged-in customers)
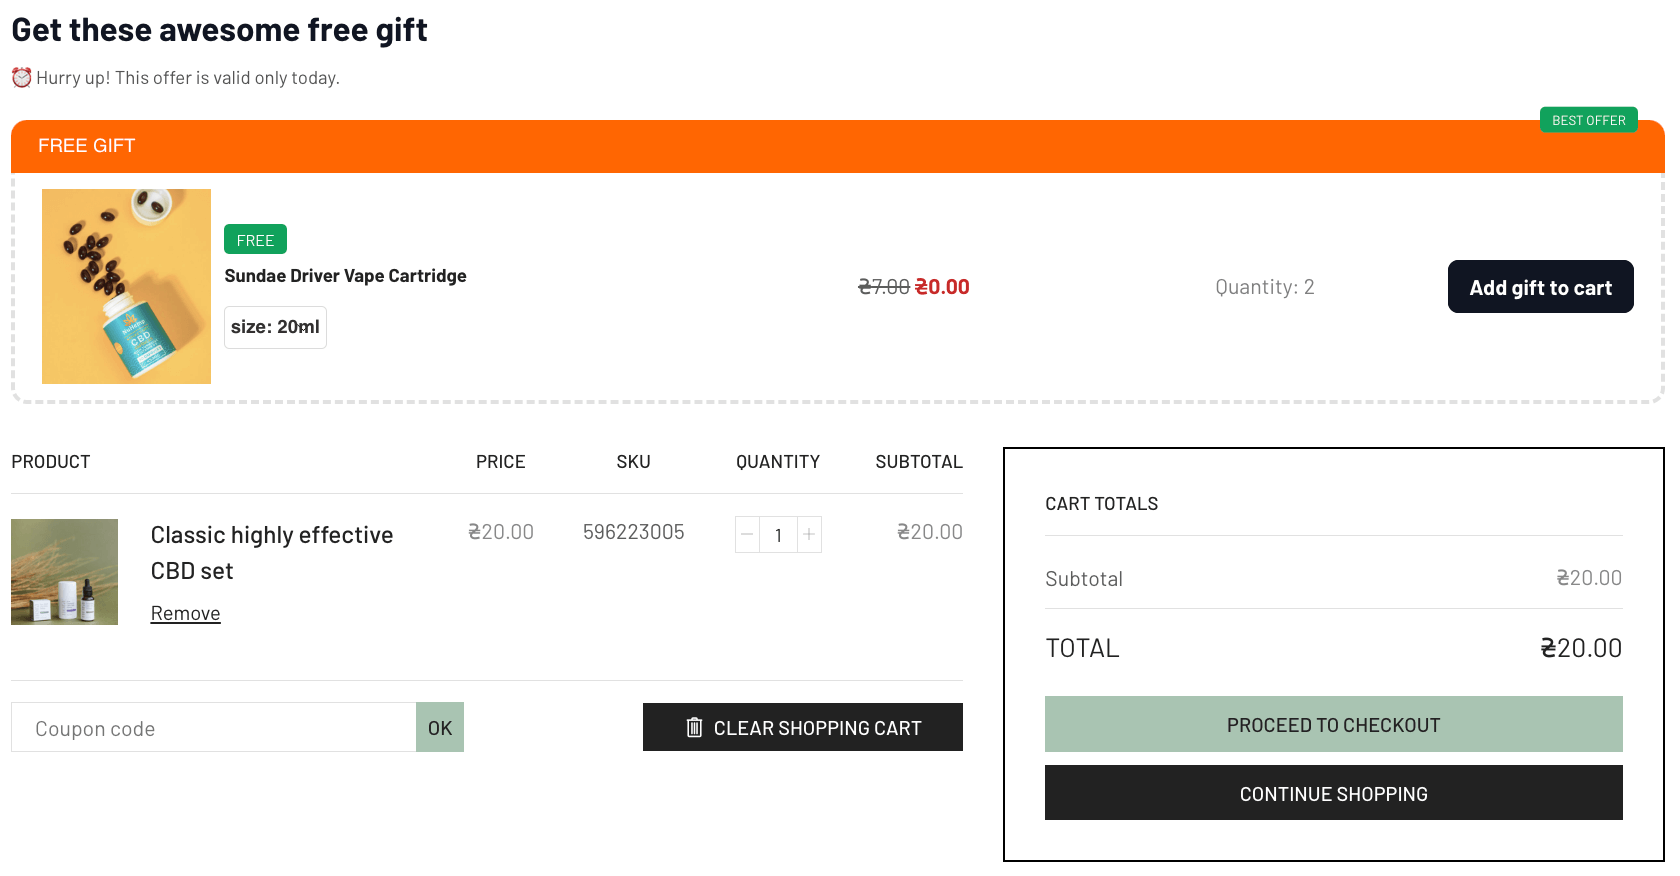
Frontend Result #
On the Cart or Checkout page, customers will see a gift offer block when their cart meets the defined conditions — such as spending a certain amount or adding specific products.
The gift will not be added automatically. Instead, the customer will see a Claim Gift button that allows them to manually add the free item to their cart.
Once added, the gift appears as a regular product in the cart with a price of $0, and will also be included in the order summary at checkout.
If the cart no longer qualifies (e.g., product removed or total drops below the threshold), the gift will be hidden or removed automatically.
💡 The gift block’s visibility and location depend on your display settings (Cart, Checkout, Mini Cart) and display conditions configured.
Troubleshooting #
If your booster isn’t displaying as expected, check the following:
- Confirm the booster is enabled in the boosters list
- Ensure the conditions (cart total, products, quantity) are being met
- Check that the gift product is published, in stock, and visible
- Disable aggressive caching plugins temporarily, especially if changes don’t reflect
- Make sure the booster is assigned to the correct display location (cart, checkout, mini cart, etc.)
- Avoid conflicts with other boosters that modify the cart or apply discounts simultaneously
The booster is not showing on the cart or checkout page. Why?
- Confirm that the selected display position is compatible with your theme.
- If using a custom or heavily modified theme, some WooCommerce hooks may be missing.
- Try switching to the “Use a shortcode” option and manually place [smax_free_gift] where you want it to appear.
If you’ve configured everything correctly but still don’t see the booster, it might be due to your page builder setup. If you’re using Elementor to design the chosen page, follow these steps:
- Open the Cart or Checkout page editor in Elementor
- Locate the SalesMax widget in the Elementor widget panel
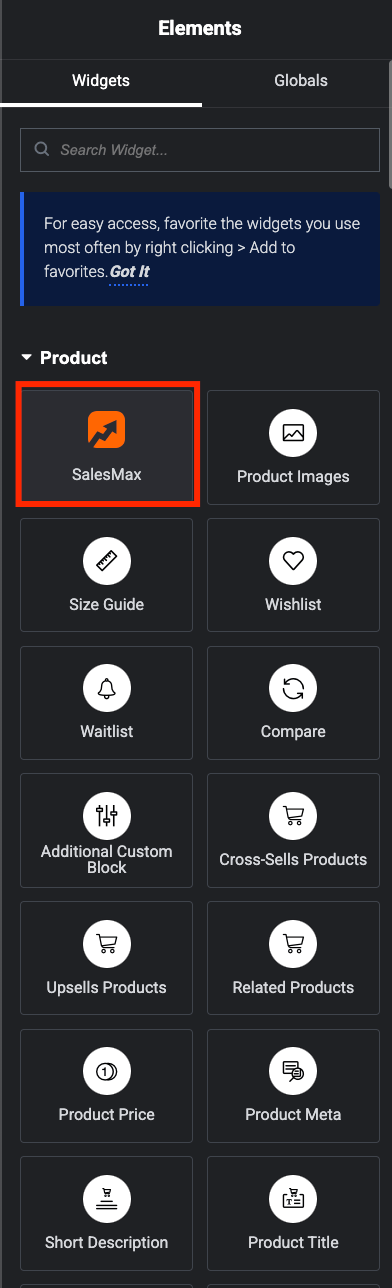
- Drag the widget to your desired location and choose the corresponding booster (e.g., Free Gift)
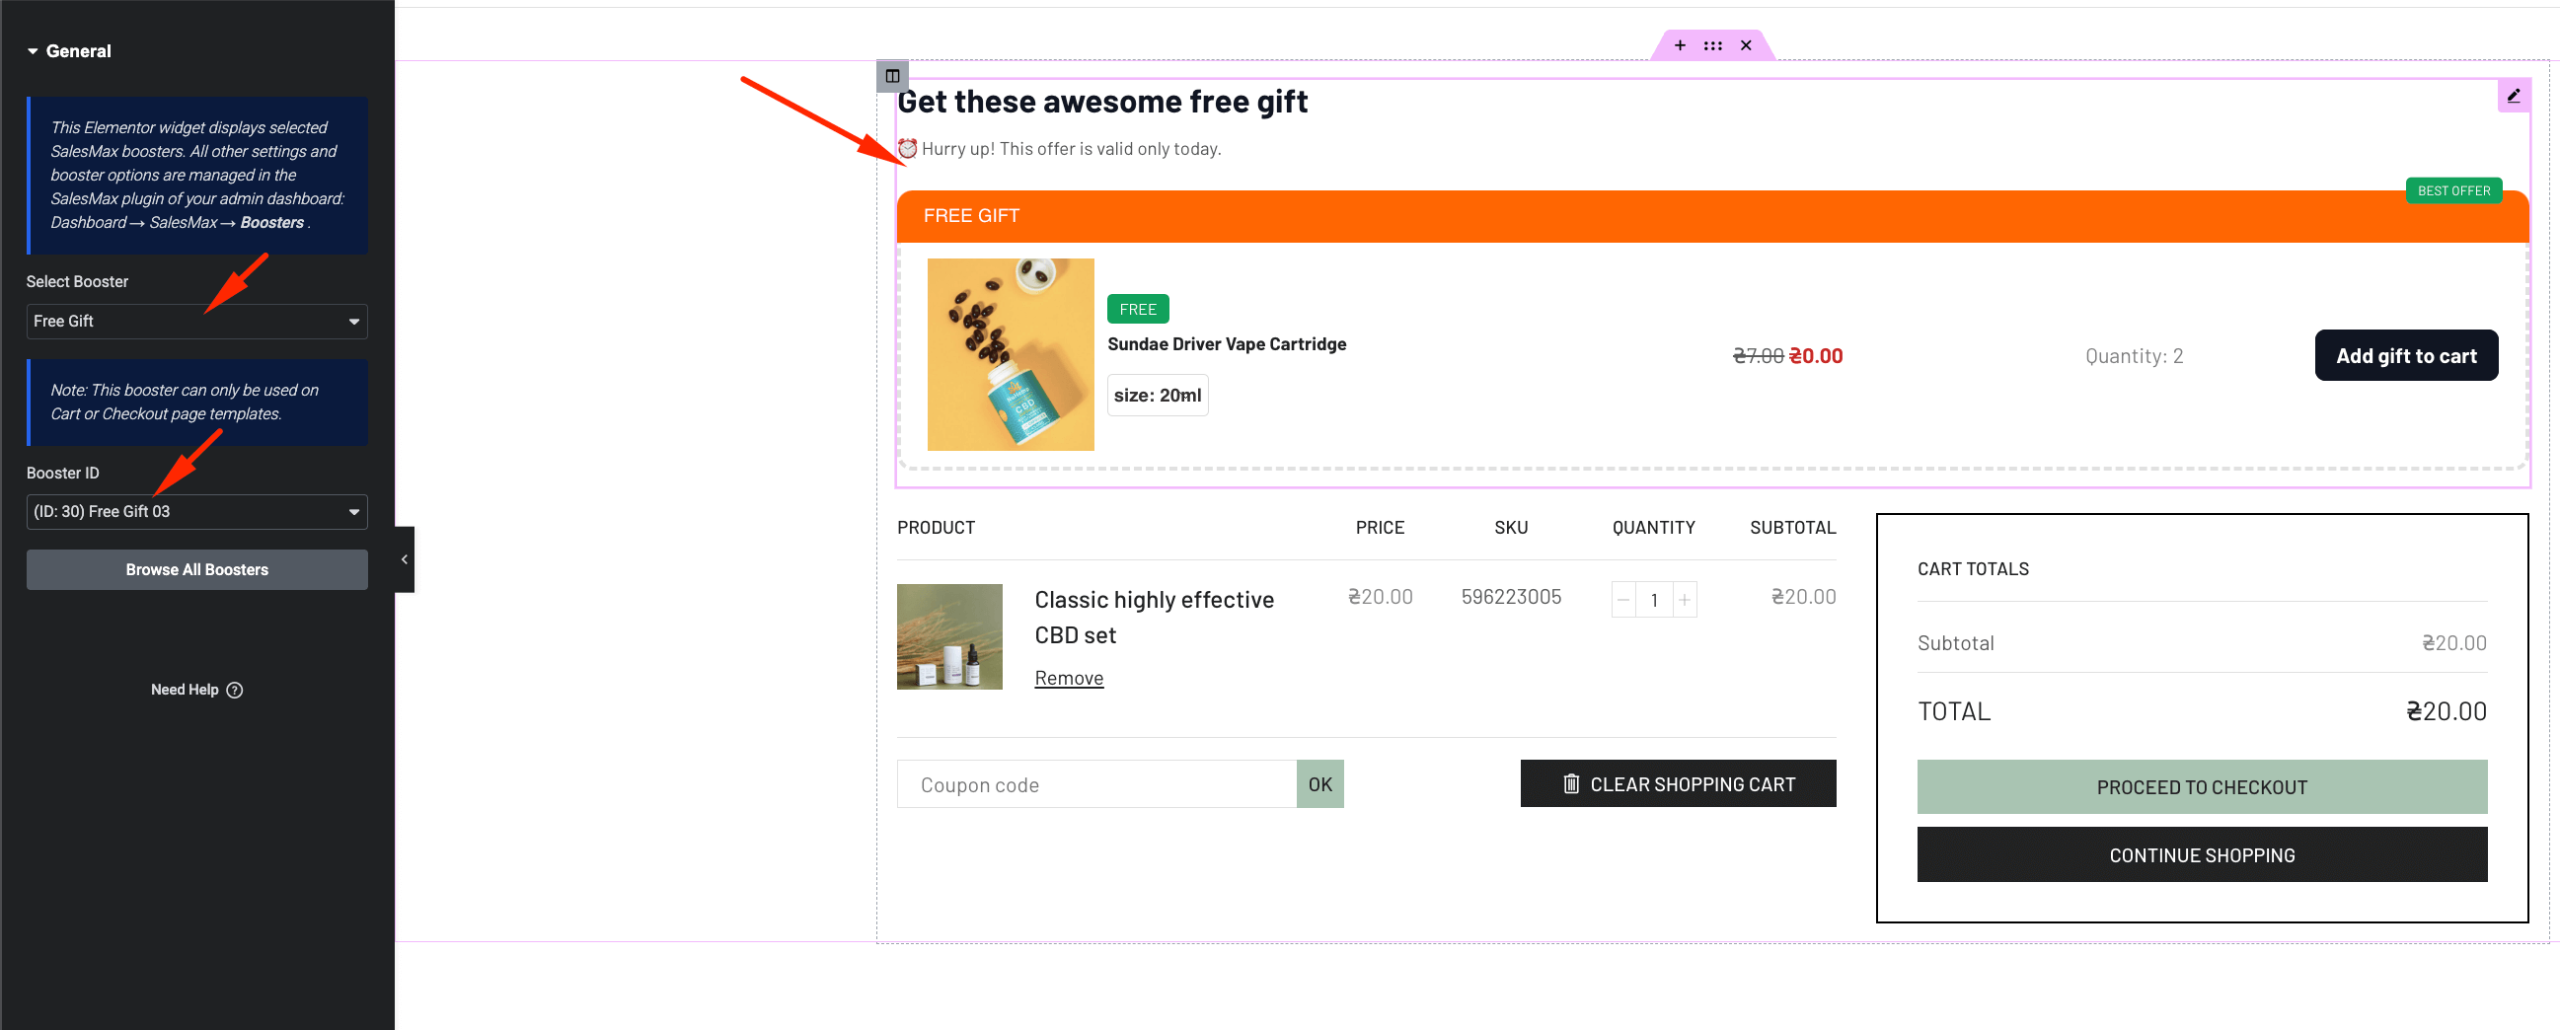
- Save and publish changes
This ensures full compatibility and dynamic display based on conditions.
If the issue persists, you can contact our support team (see below).