Many of our customers ask us about the recommended hosting for our products. A few days ago, we had a chance to try Cloudways, a managed WordPress hosting platform, and in this article, we’ve comprehensively covered the topic to help you understand what Cloudways really is and how it differs from other hosting providers.
To begin with, Cloudways is one of the leading managed cloud hosting platforms. What they essentially do is that they simplify the hosting processes and provide an intuitive platform for you to install your web applications on a cloud server with one-click operations.
The Cloudways Platform comes with tons of features and supports all major applications (like WordPress and Magento) to help you to grow your business.
Let’s check out the key factors that help Cloudways stand out from the rest.
Cloudways is partnered with the industry-leading cloud providers such as Google, Amazon, DigitalOcean, Linode, and Vultr, which means that it enables you to access servers to launch your application on any data center (60+ global locations) irrespective of your physical location. For instance, if you live in London and want to launch a server in New York, you can quickly do so with a few clicks and start your online business.
Numerous other factors like great performance, optimum security, unwavering reliability, scalability when needed, and dedicated IPs among many other means that Cloudways is far better than other hosting providers (shared, dedicated, and VPS hosting, etc.).
Let’s take a closer look at these features to get a clearer picture of why Cloudways is a better choice.
1. Performance: Cloudways helps you to optimize your website performance and boost your site speed. It uses LAMP (Linux, Apache, Maria DB, and PHP) stack with NGINX as a reverse proxy that lets you maximize performance while using minimum resources. As a designer, I know we never noticed these things, but this understanding will help you to choose the right hosting provider.
2. Security: Security is the biggest threat these days, but thanks to Cloudways security firewalls, you don’t need to worry about it. Cloudways helps you maintain your security and its platform comes with dedicated firewalls, SSH/SFTP logins, Whitelist IPs, Free SSL Certificates, 2FA (two-factor authentication), and much more.
3. Scalability: Cloudways offers a wide range of servers from 1GB to hundreds of GB, from DO to AWS, all costing from 10 dollars to thousands of dollars. Well, it’s a vast server range that means if your business starts growing and you want a bigger server, then you can quickly scale up the server size to fulfill your website needs.
4. Dedicated IP: Unlike shared hosting providers, Cloudways provides a dedicated IP to access your web server, which means you’re not sharing it with others.
5. Easy-to-Use: Cloudways provides a convenient platform through which you can quickly launch your desired cloud server, add your team members, create a project, assign team members and do much more with a few clicks and in minutes.
6. Reliability: When it comes to reliability, Cloudways is far better than other hosting providers because they have many server options (60+ data centers) as compared to Shared hosting & VPS hosting.
7. Price: If you survey the hosting market, you’ll find that managed cloud platforms are expensive. But Cloudways offers a budget-friendly plan starting from $10 (DO server) which I think is the best thing about Cloudways.
8. Application Limits: Unlike other managed hosting platforms, Cloudways does not limit you to the number of applications on a single server and you pay only for the server at the end of the month.
The factors mentioned above are enough to choose Cloudways over any other hosting.
Now, it’s time to check and dig deep inside the Cloudways platform.
Cloudways comprises five Cloud infrastructure providers: DigitalOcean, Vultr, Linode, AWS, and Google Cloud Platform. What Cloudways essentially does is that it works as a bridge between users and cloud service providers.
Getting started with Cloudways is easy; all you have to do is Sign Up for Cloudways and Choose an application, select the cloud provider, server size, data-center and click the Launch Now button.
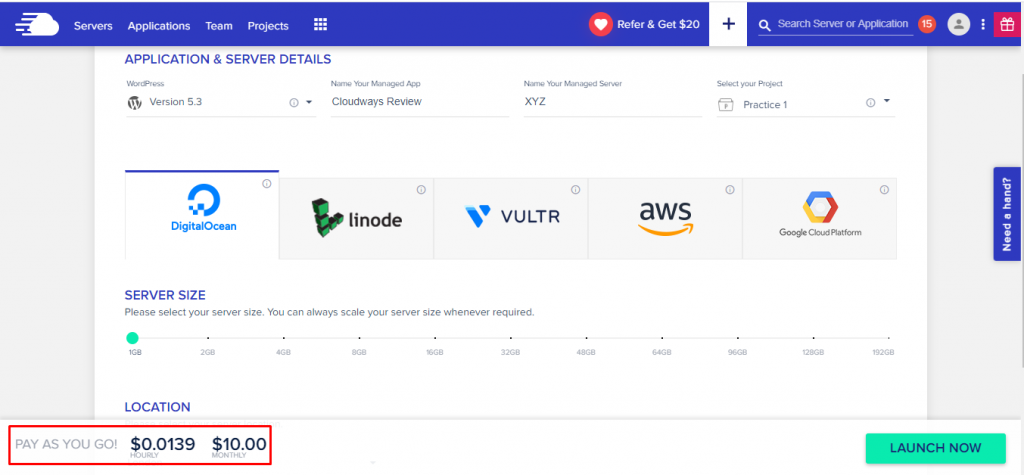
You’ll also find the pricing based on your server size at the bottom left of your screen. Cloudways follow the pay as you go pricing model, which means you’ll be charged only for the resources that you consume (for that particular period only).
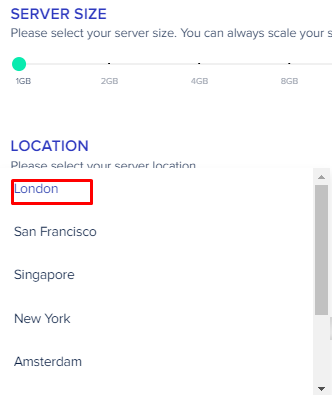
Also, you can choose the location of your server. I’d suggest that you choose a location where you want to start a business or want to target the audience.
With just a few clicks, you can launch your server and application for your business site and it takes a few minutes to add a server and application.
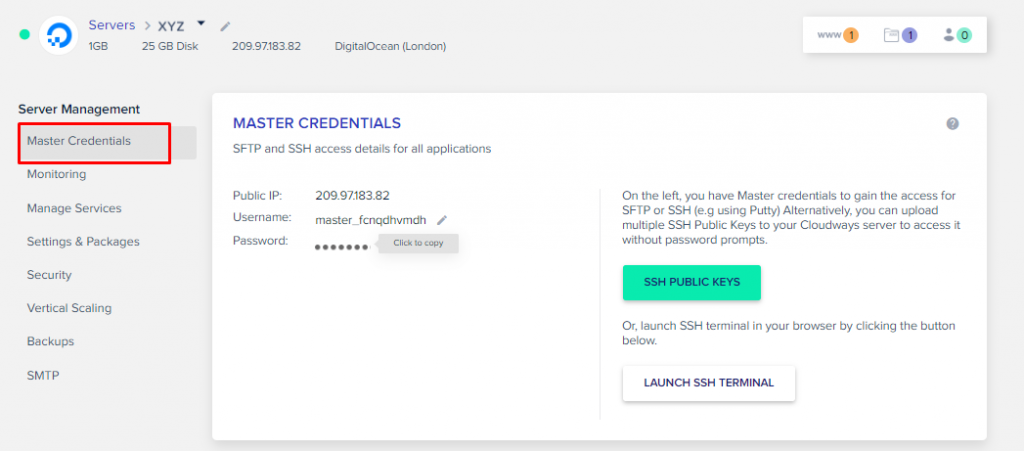
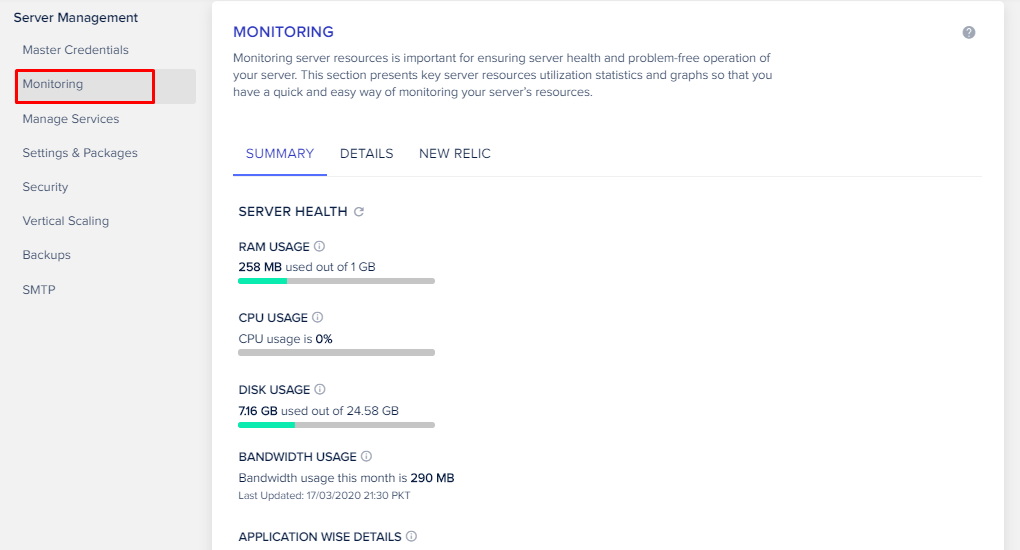
After adding a server, click on it to see the server management Dashboard. You’ll find different tabs on the server management screen. Let’s check out each tab.
Master Credentials: The first tab is the master credentials tab where you’ll find the access credentials of your web server.
Monitoring: This allows you to monitor your server health summary and details (graphs).
Manage Services: You can manage your core services such as Apache, Varnish, and MySQL, etc.

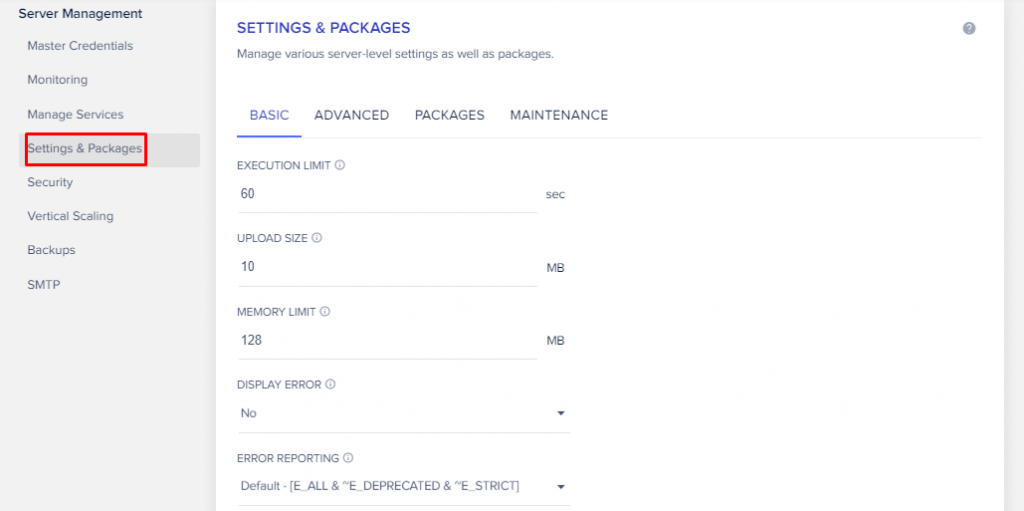
Settings and Packages: You can manage server-level settings like setting the PHP execution limit, Upload Size limit, and Version controls (PHP and MySQL), etc.
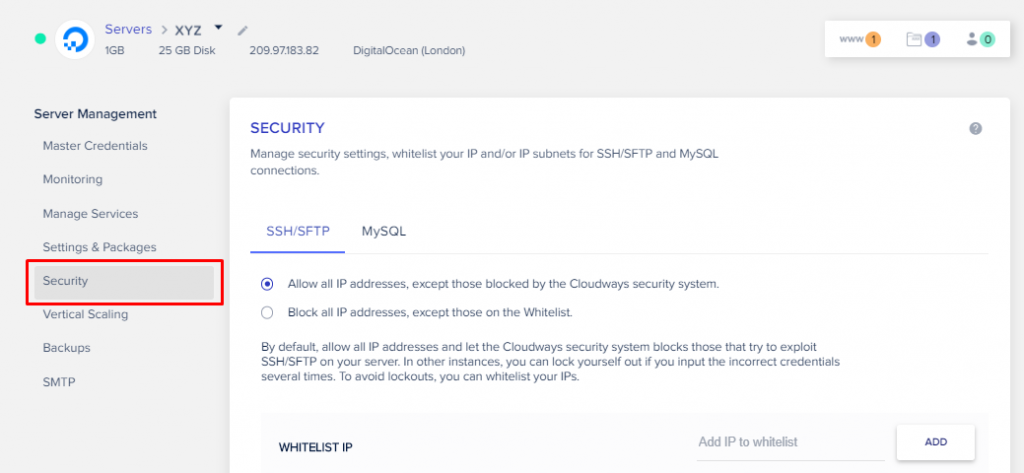
Security: You can manage your security settings from this screen by whitelisting your IPs for SSH/SFTP and MySQL access.
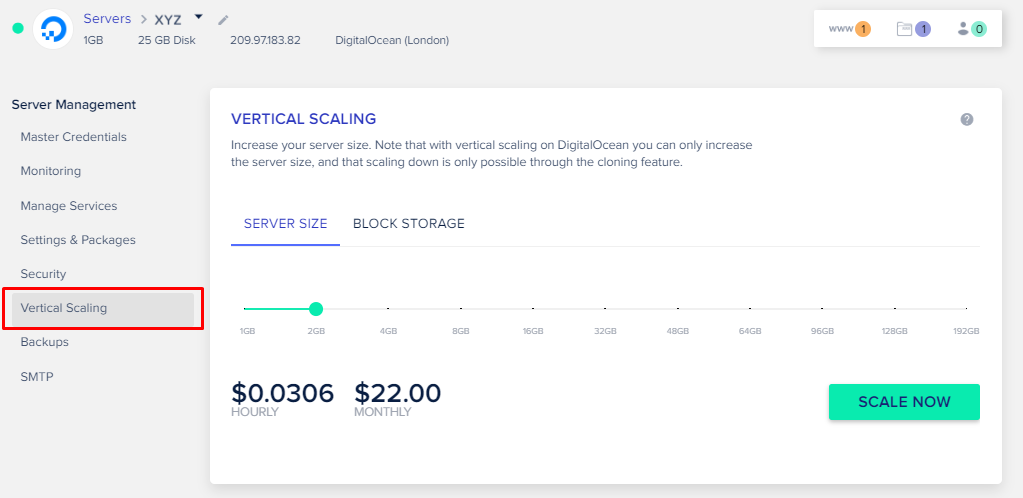
Vertical Scaling: If you want to increase your server size then this screen lets you do that.
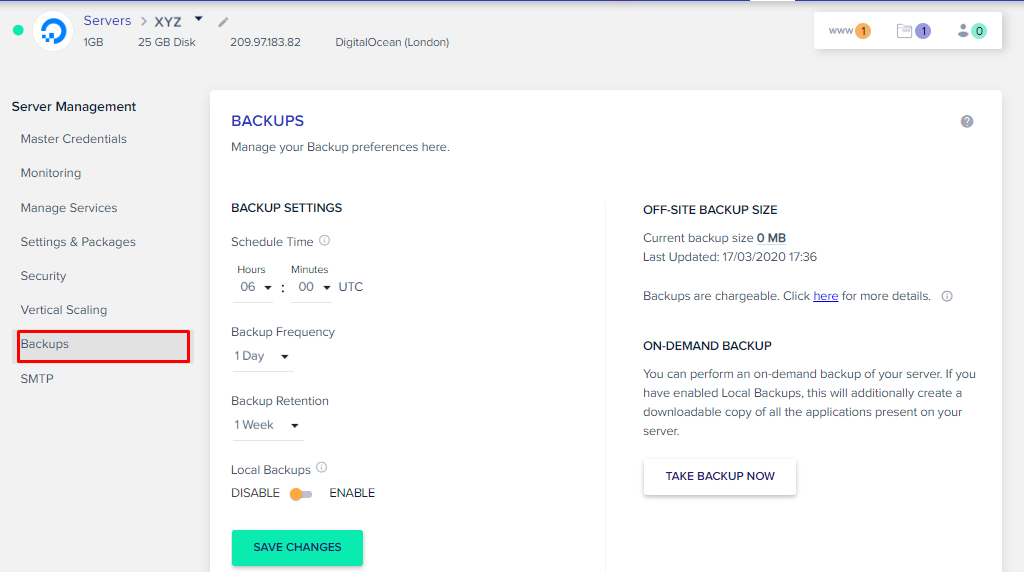
Backups: You can schedule your backups and set up backup preferences.
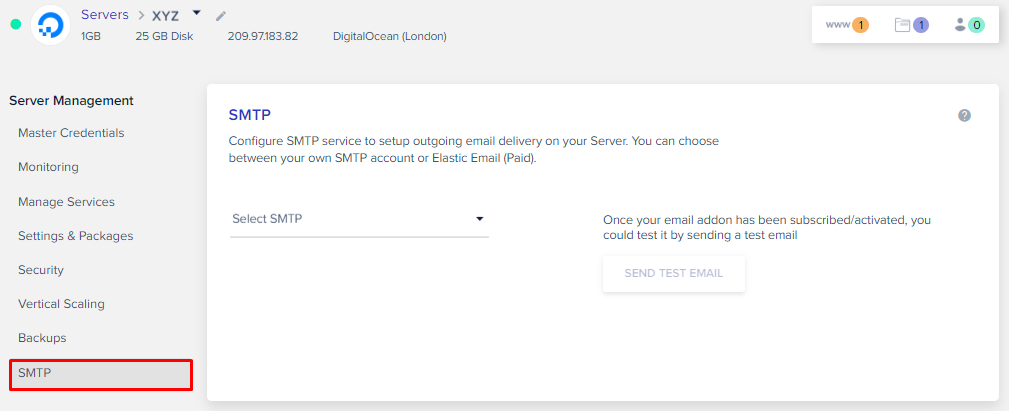
SMTP: You can configure the SMTP service on your server (Email Delivery).
In a nutshell, Cloudways provides a server dashboard through which you can easily change the settings, check the site’s health, and Manage security, etc., of your server.
Just like the Server Management dashboard, Cloudways also has its application management dashboard to control the application-level settings.
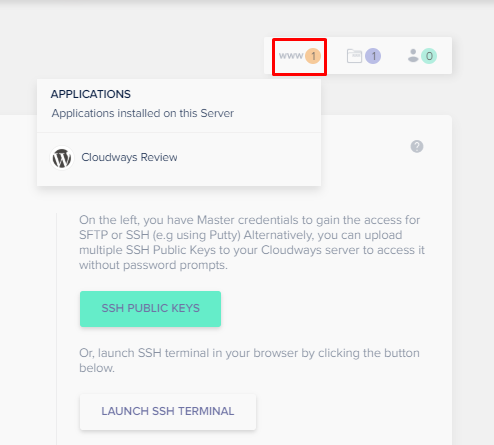
To access an application, click on the www icon that you’ll find in the top right corner of your screen. You can also access it with the Application menu (top navigation).
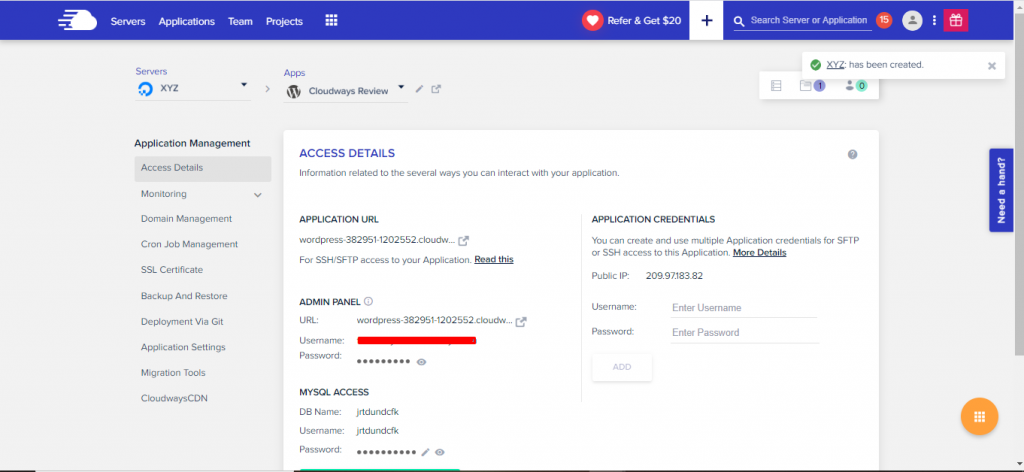
Next, you’ll see a Cloudways Application Management Dashboard from where you can easily manage your application (like cPanel). You’ll find several sections from Access Details to CloudwaysCDN.
Let’s check each section.
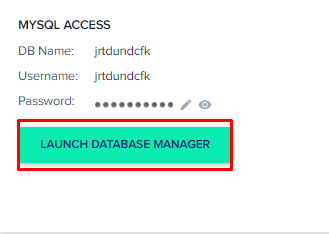
Access Details: You’ll find the default login credentials of your Application (in my case, it’s WordPress). You can also access your database from this section.
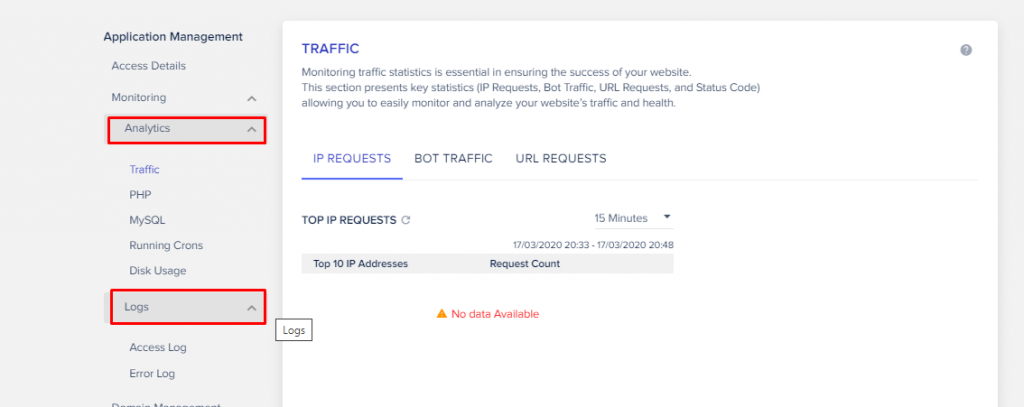
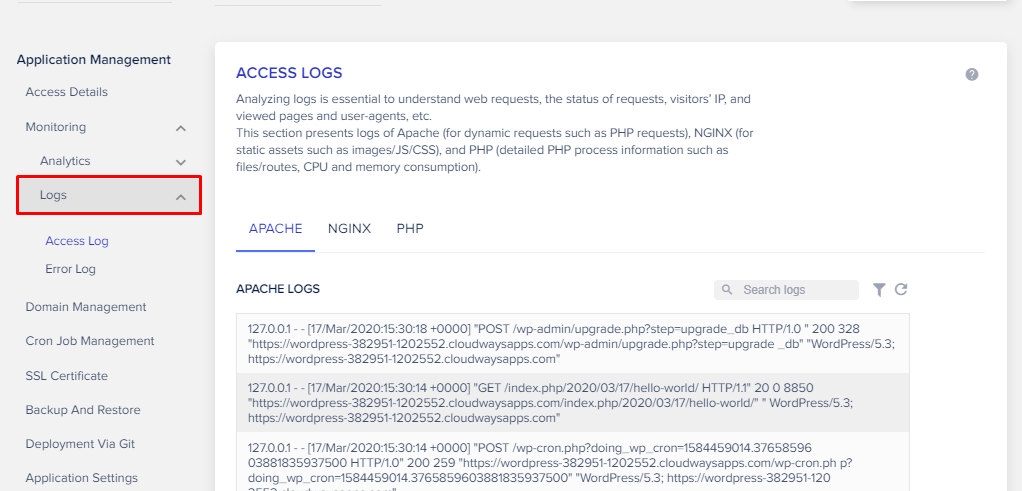
Monitoring: The monitoring tab is divided into two sections; Analytics and Logs. And each section includes sub-sections.
The purpose of the Analytics section is to monitor the application (Traffic statistics, PHP performance, MySQL execution, Cron job monitoring, and Disk Space consumption) and check your site’s health.
The purpose of the logs section is to analyze and check the logs (access and errors) of Apache, NGINX, and PHP along with the log information.
Domain Management: In this section, you can add and manage your domain. Also, you can add a subdomain in the additional domains field.
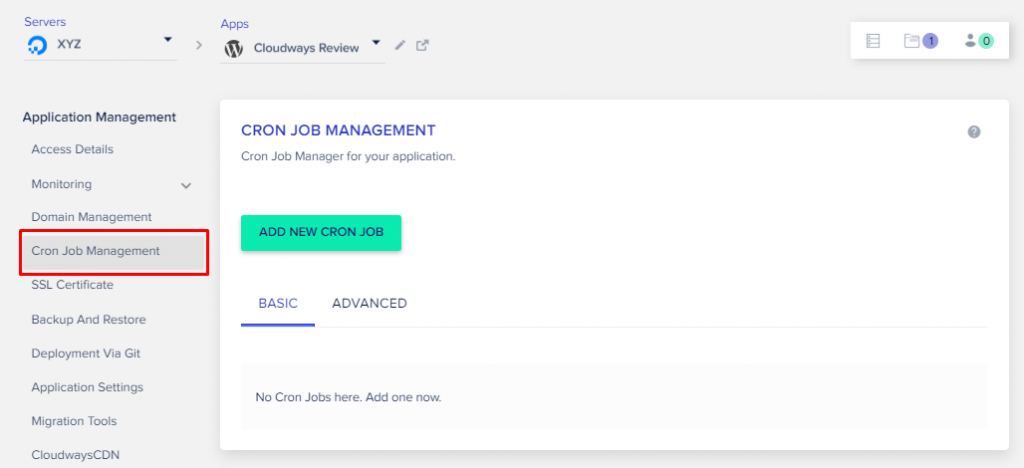
Cron Job Management: This allows you to create and manage cron jobs for your application.
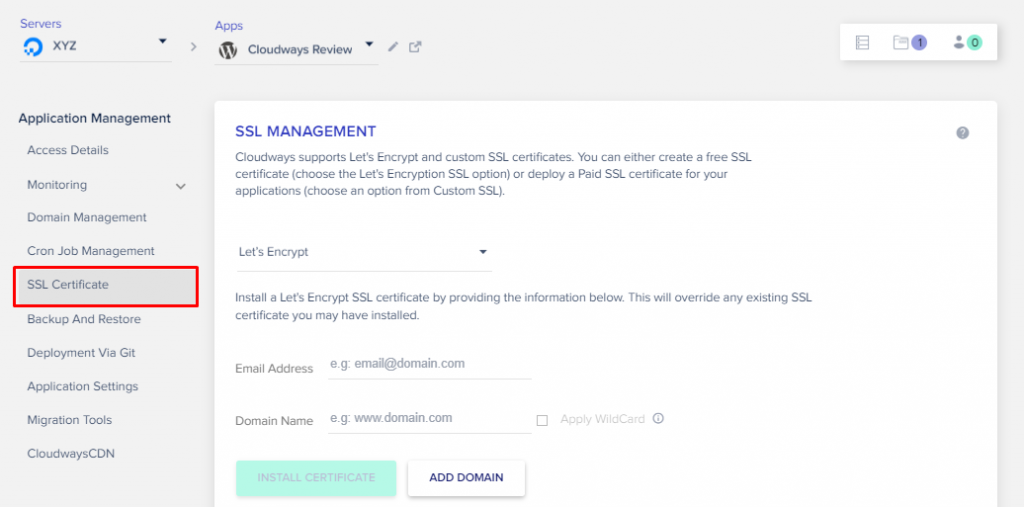
SSL Certificate: This section allows you to install an SSL certificate on your website. The best part is that Cloudways offers a Free SSL certificate to install.
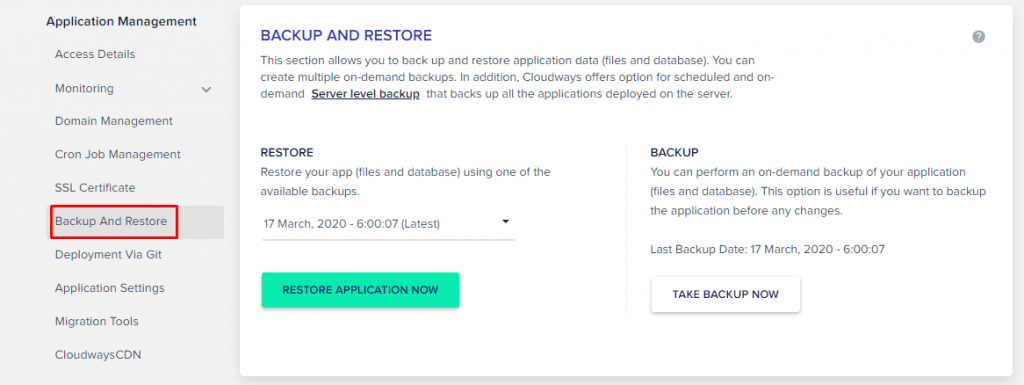
Backup and Restore: In this section, you’ll find free automatic backups of your applications through which you can easily restore the previous data (files and database) of your application.
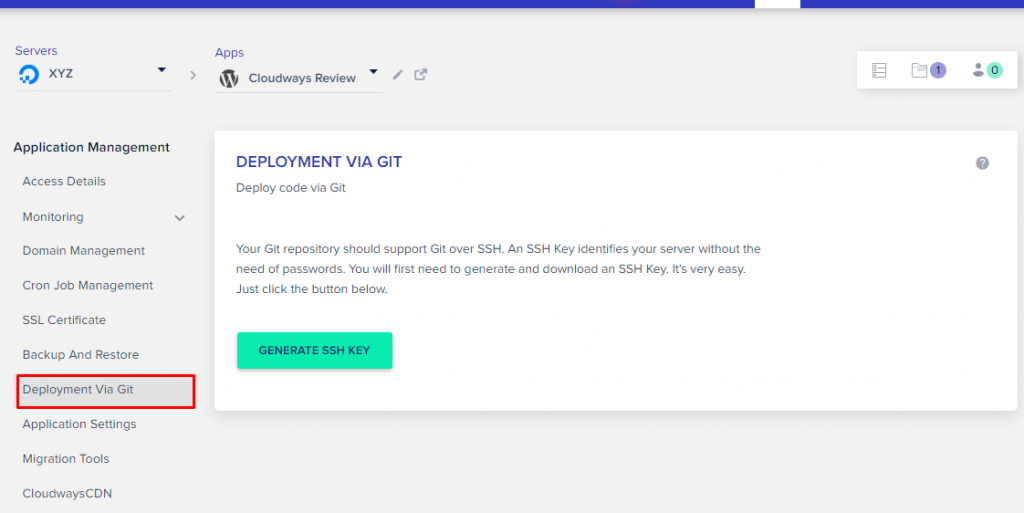
Deployment via Git: If you want to deploy the code via Git, then this section allows you to do so.
It’s very easy to use and all the instructions are available in the description.
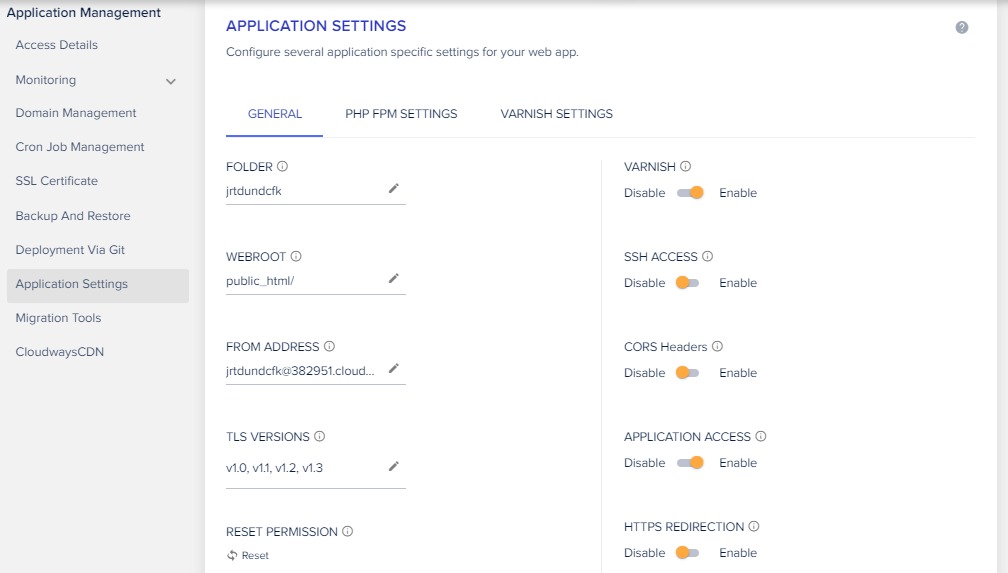
Application Settings: This section allows you to configure application settings like Varnish settings, SSH access, HTTPS redirection, PHP FPM settings and much more.
Migration Tools: In this section, you’ll find the Cloudways migration plugin that offers free migration from any hosting to Cloudways. It’s simple; all you have to do is install the plugin and fill in the required fields.

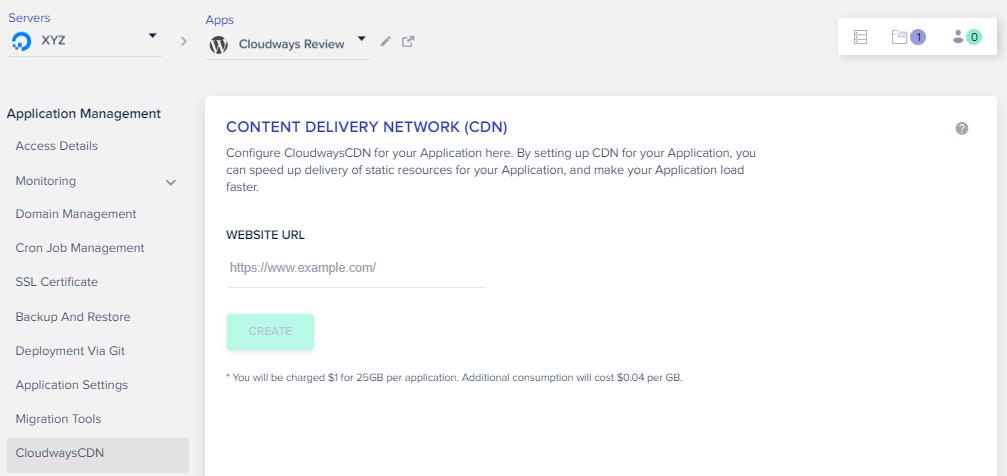
CloudwaysCDN: If you want to use a CDN for your WordPress site or want to boost the site speed, then CloudwaysCDN is a good option. All you have to do is just put your site URL and click on create.
I hope this article helped you understand what Cloudways is and why it can be your next WordPress host.
I understand, there is a learning curve if you are using cPanel. But I think it’s easier than cPanel when you get used to it.
Have you ever heard about Cloudways before? Let us know in the comments below.