 Now, after you configure discount rules for your products, let’s take a look at the “Shop” page.
Let’s assume you have the following rules in place –
Now, after you configure discount rules for your products, let’s take a look at the “Shop” page.
Let’s assume you have the following rules in place –
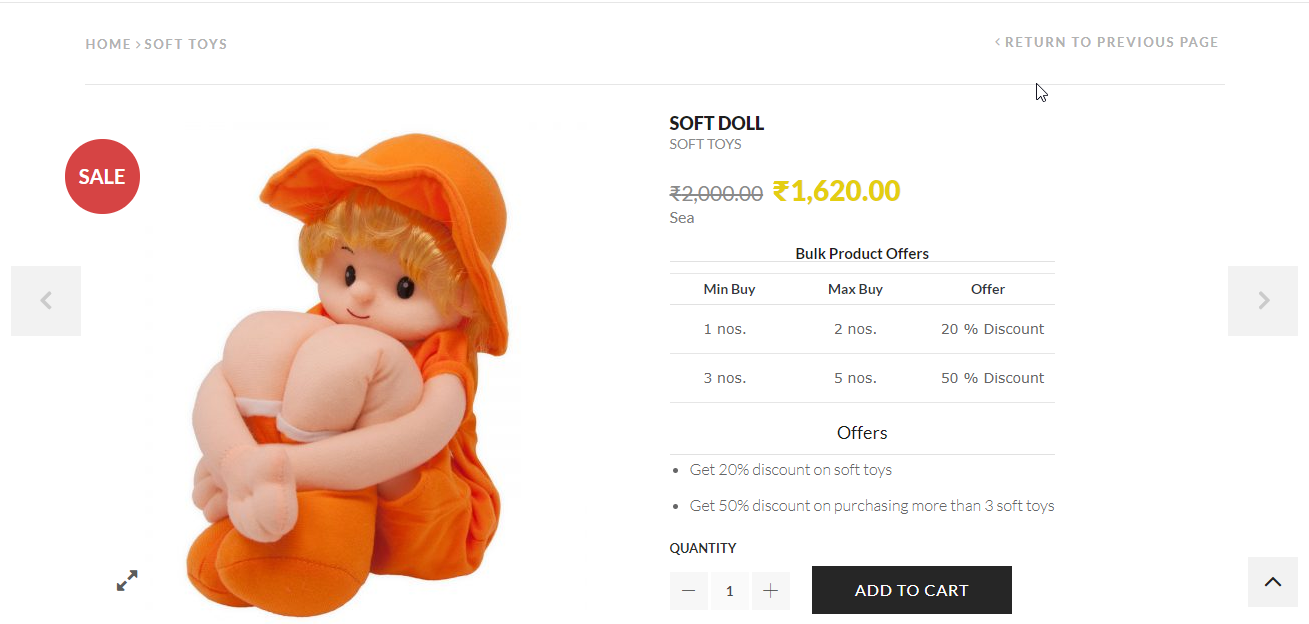
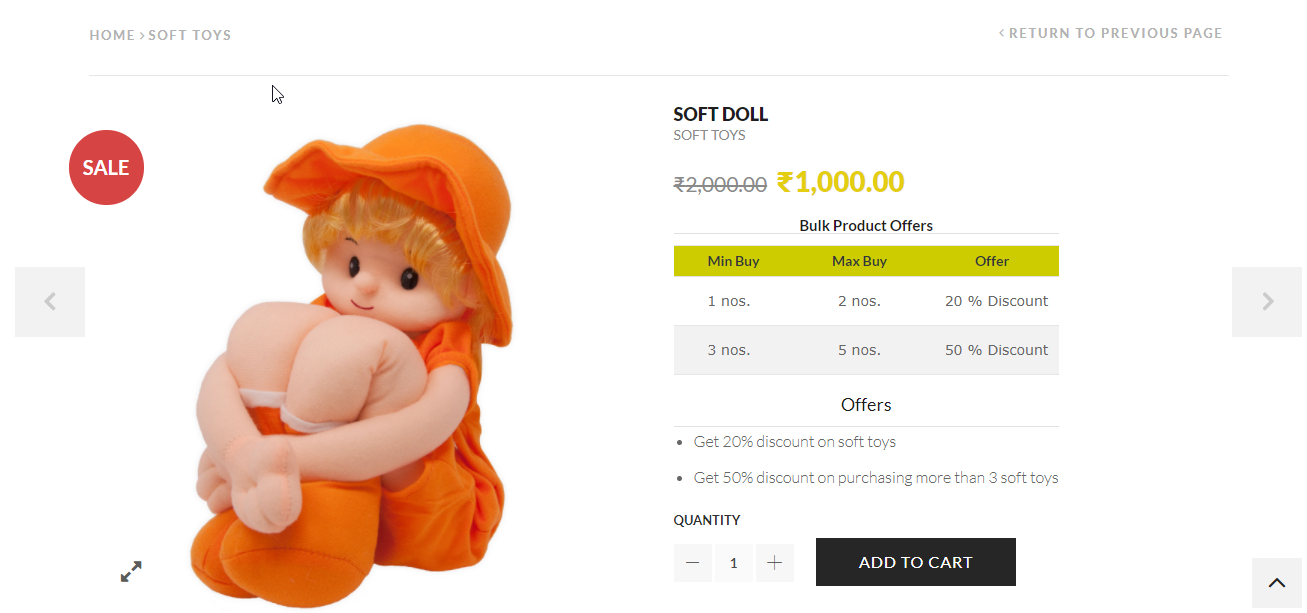
 The shop page would appear as the following –
 The product for which the discount rules have been setup has the “Sale” badge.
The theme has an inherent feature by which you can enable the “Catalog Mode” which will hide the “Add to Cart” buttons corresponding to each product.
You can further customize the “Shop” page by changing the display of the “Sale” badge. Replacing “Sale” text with the discount amount might increase the chance of getting it easily noticed by customers.
The product for which the discount rules have been setup has the “Sale” badge.
The theme has an inherent feature by which you can enable the “Catalog Mode” which will hide the “Add to Cart” buttons corresponding to each product.
You can further customize the “Shop” page by changing the display of the “Sale” badge. Replacing “Sale” text with the discount amount might increase the chance of getting it easily noticed by customers.

 Now, thanks to the WP Bakery, which is included in the XStore theme, you can easily customize the Pricing Table by adding some custom CSS.
For instance, in order to get the below result,
Now, thanks to the WP Bakery, which is included in the XStore theme, you can easily customize the Pricing Table by adding some custom CSS.
For instance, in order to get the below result,
 You need to add the following code snippet –
table {
 border-collapse: collapse;
 width: 100%;
}
th, td {
    text-align: left;
    padding: 8px;
}
tr:nth-child(even){background-color: #f2f2f2}
.xa_sp_table_head2_cell {
    background-color: #CCCC00;
    color: white;
}
Similar to this, you can add any other preferred styles.
That’s just the tip of the iceberg. You can even customize the “Offers” table etc.
Hope this article helped you in selling your products.