Let’s Encrypt SSL Certificate: The What, Why and How Of It?
  • April 20

Let’s Encrypt SSL Certificate: The What, Why and How Of It?

One of the biggest problems with WordPress is that it is vulnerable to hackers and attacks. But, this does not mean that WordPress is not completely secure. In fact, the CMS comes with lots of security features. Also, many security fixes and solutions are offered to WordPress users on a consistent basis to deal with security threats and vulnerabilities. However, the popularity of the CMS is what makes it the frequent target of hackers. While many ways can help in keeping your site protected against vulnerabilities, possibly you might not have considered adding an SSL certificate to secure your site. It's no wonder that you haven't still considered using an SSL certificate, considering the fact that it can be cumbersome and expensive. But, this scenario seems to be changing with the introduction of open source certificate authority called Let's Encrypt. I'll talk about what is “Let's Encrypt”, why should you be using it, and how it helps in installing an SSL certificate in the backend of a WordPress site.

Getting to Know About Let's Encrypt SSL Certificates: The What and Why?

As I've mentioned previously in this post, Let's Encrypt is an open source certificate authority. Introduced by the Internet Security Research Group (ISRG), Let's Encrypt is built for the sole purpose of providing free SSL certificates to users. And most importantly, it helps in making the process of certificate installation automated. If you've tried setting up a secure WordPress site using an SSL certificate, then you must be knowing how difficult it can be to get a certificate issued and maintained. But, Let's Encrypt can help you in taking away the pain associated with installing an SSL certificate, by helping site owners in turning on and managing HTTP using simple commands.
20_3 Let's Encrypt is made available to people in the form of a beta software that contains many bugs. Thus, it is advised that you must thoroughly test the software before using it on production systems. The open source certificate authority, Let's Encrypt is backed by some of the niche companies like Sucuri, Cisco, Mozilla, Automattic, and many more. For more detail on Let's Encrypt, check out the link https://letsencrypt.org/. So, now that you have come to know about what is Let's Encrypt and what purpose it solves, let's head to the next section to learn the process of installing the SSL certificate using Let's Encrypt.
But Before You Start

Of course, you need to be familiar with the basic server requirements before you begin with installing an SSL certificate. According to the Let's Encrypt Client documentation, you need to meet following system requirements to run the client:
  • First and foremost you require Unix-ish Oses, including Python 2.6 or 2.7 versions for running the Let's Encrypt Client.
  • Secondly, you require root access for performing write operations to “/etc/letsencrypt”, “/var/log/letsencrypt”, “/var/lib/letsencrypt”. In case, you don't have access to the root, you can still carry on with certificates installation using options such as 'sudo' or 'yum'.
  • Make sure that your hosting provider can provide you with SSH access.
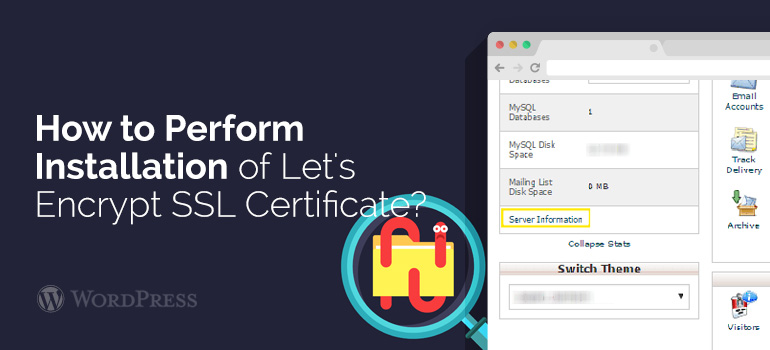
  • Furthermore, check out that the versions of PHP, Python and Apache server are up-to-date in the cPanel. You can verify the version details of PHP and Apache, by getting logged into your cPanel and press the 'Server Information' link provided on the left side in the menu:
On the other hand, to view version of Python, you'll have to log in to your web server using the SSH command. Remember that a few hosts already have Let's Encrypt package installed on your server. But, if your hosting provider does not provide such package, you can have it installed natively. For this, you'll have to perform Git installation on your server's root. Note: One important thing to notice is that you'll have to suspend the Content Delivery Network (aka CDN) enabled for your WordPress website during Let's Encrypt installation. If not, then you will likely encounter several errors. Also, you must stop all the processes that use ports '80' and '443' for preventing an error while installing a certificate. So, now that you have become well versed with the basic server requirements that are essential for running the Let's Encrypt Client, let's proceed and understand the actual process you need to follow for installing an SSL certificate provided by Let's Encrypt into your WordPress site.

How to Perform Installation of Let's Encrypt SSL Certificate?

In this part, we'll be discussing how to complete installing Let's Encrypt SSL certificate into your WP site using the following steps:
Step 1: Installing Let’s Encrypt
This step applies to WordPress users who are using a server that comes with built-in Let's Encrypt packages. In short, if the packages for Let's Encrypt are already installed on your server, then just install the package from there and use the following commands to start installing Let's Encrypt: $ git clone https://github.com/letsencrypt/letsencrypt $ cd letsencrypt $ ./letsencrypt-auto --help The first command makes a call to the Let's Encrypt package installed on your server, on GitHub using the Git command. The second command displays the Let’s Encrypt file that you'll install using the first command. And at last, letsencrypt-auto is used to complete the Let's Encrypt installation.
20_2 Step 2: Using the Let's Encrypt Client You might have understood the process of installing Let's Encrypt Client, but that's not the end of your journey to installing an SSL certificate. Of course, you'll have to learn about how you can make use of the client on your site. So, once you've installed the Client, your next step should be to run the Let's Encrypt client and install an SSL certificate. To fulfill such need the Let's Encrypt client allows using many different "plugins” – that proves useful in obtaining and/or installing an SSL certificate. Let's have a look at some of the options that can help you in accomplishing such need:
  • In case you run Apache on the latest version of the Debian-based operating system, you can choose to use the Apache plugin for installing certificates. The best aspect about the Apache plugin is that it helps automate the process of acquiring and installing certificates:
letsencrypt --apache
  • Keep in mind, automatic installing is still not available on all of the servers. And so, for installing the certificates using the plugins, you will need to make use of the "certonly" command. Below you'll find a few examples demonstrating how you to install certificates using plugins and certonly command:
1) If you're using a webroot directory of any particular webserver software, then to acquire a certificate you'll need to make use of the "webroot" plugin: letsencrypt certonly --webroot -w /var/www/yourwebsite -d yourwebsite.com -d www.yourwebsite.com -w /var/www/thing -d thing.is -d m.thing.is The above command will help in obtaining just one single certificate for the site yourwebsite.com, www.yourwebsite.com, thing.is, and m.thing.is; furthermore, the command will put the files below /var/www/yourwebsite to provide you with control over the first two domains, and will place rest of the files under /var/www/thing. 2) Next, for obtaining a certificate for a standalone server for the site yourwebsite.com and www.yourwebsite.com use the following command: letsencrypt certonly --standalone -d yourwebsite.com -d www.yourwebsite.com  Note: When you need to install a cert. for a standalone server, you'll need to stop your current web server. Also, don't forget to replace 'yourwebsite' domain name used in the lines of code above with your site's domain name. Output: Here's an example of a website running SSL: Step 3: Revoking a Certificate The above two steps will help you install the certificate on your site. But, at times, you might have to revoke the certificate, especially in the case when your website gets hacked. In that case, what you just need is to use a single command. In case, you've installed an SSL certificate on your server that already had Let’s Encrypt package installed, just use the below command into your SSH client for revoking the certificate: letsencrypt revoke --cert-path yourwebsite-cert.pem But, if you would have to install the certificate on your own, make use of the following command (instead of the above command): letsencrypt-auto revoke --cert-path yourwebsite-cert.pem Summing Up If you have been facing issues with installing SSL certificate into your WordPress site, then you must give Let's Encrypt a try. It's an excellent software that lessens the stress associated with SSL certificate installation, by making the process automated. When it comes to installing a certificate via Let's Encrypt, you can find several plugins provided by the-the Let’s Encrypt community to get the job done efficiently. You can find all the list of plugins made available by the Let's Encrypt community on GitHub. If you decide on using any plugin make sure to take necessary security measures and precautions to avoid your site's security being compromised. This is because you can't guarantee whether the plugins are secure or not. Author Biography: Sarah Parker is a HTML to WordPress developer in D2H. She has strong experience in technical writing and development of various WP websites and themes. She is very choosy and perfect in mood. She also loves to read about new things in WordPress.

Did you know ?

One standard license is valid only for 1 project. Running multiple projects on a single license is a copyright violation.

We're using our own and third-party cookies to improve your experience and our website. Keep on browsing to accept our cookie policy.